I was looking for a .NET library to integrate with an API to provision Azure resources using C# language. Initially, I considered adopting .NET Azure Resource Manager library. However, during my research, I came across Pulumi, which seems to offer an alternative solution.
Pulumi, founded in 2017, is an infrastructure-as-code tool that uses imperative languages such as JavaScript, C#, Python and many others to represent the state of your infrastructure. It uses the concept of Desired State Configuration (DSC). You define how your infrastructure should look, and then the tool decides what needs to be created, updated or deleted based on the current state of your infrastructure. It doesn’t recreate everything but analyses the new changes and identifies what exactly has changed.
Pulumi Cli tool
You must use Azure CLI to log in and set your subscription when working locally.
az login
az account set
You can install Pulumi CLI through Chocolatey or downloading the installation package from Download & Install Pulumi | Pulumi Docs.
choco install pulumiAfter installing Pulumi, type “pulumi new” to bootstrap your project. Pulumi CLI uses Pulumi Cloud to manage the state of your infrastructure and, therefore, requires you to log in to the Pulumi Cloud.
Pulumi Cloud is an easy-to-use, secure, and reliable hosted application with policies and safeguards to facilitate team collaboration.
Alternatively, you can use different backend options, in addition to simple object storage in AWS S3, Microsoft Azure Blob Storage, Google Cloud Storage, any AWS S3 compatible server such as Minio or Ceph, or a local filesystem.

To start using Pulumi, you can choose from several templates (227 at the time of writing) or use AI for a customized experience. Whether you decide to use AI, you can ask things like “Create a storage account with public access disabled.” as shown in the example below:
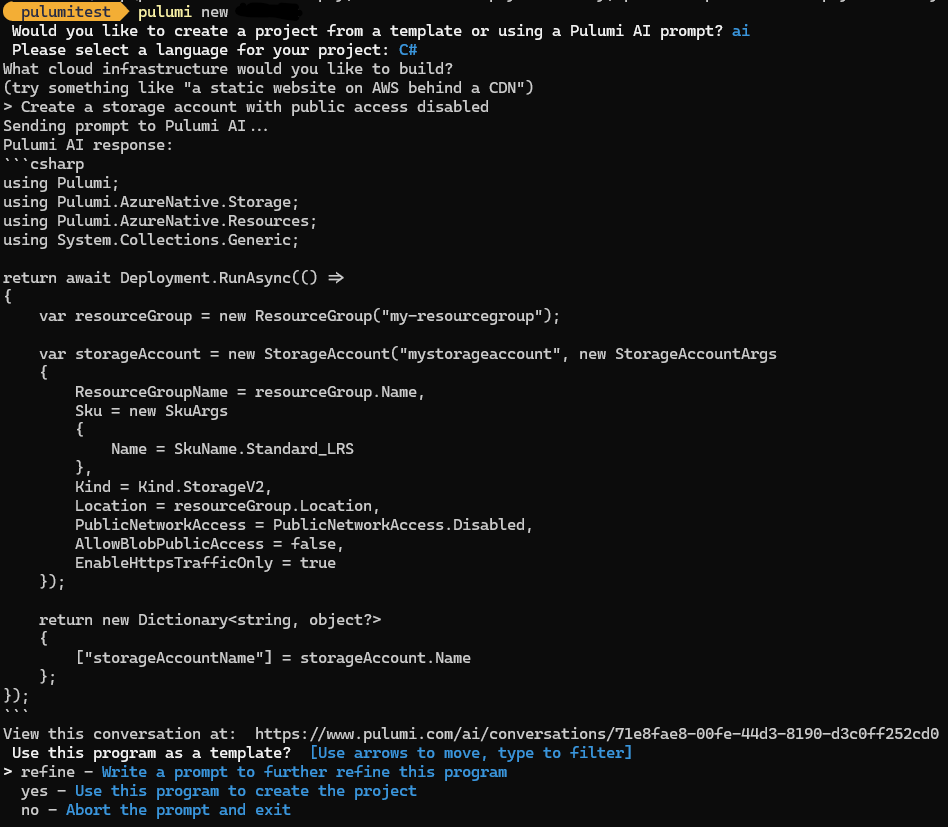
Pulumi CLI will start a prompt to further refine your scripts. Once you are ready to proceed select “yes”! For this demo, I’m not using AI, but “azure-csharp” template as you can see in the next image.
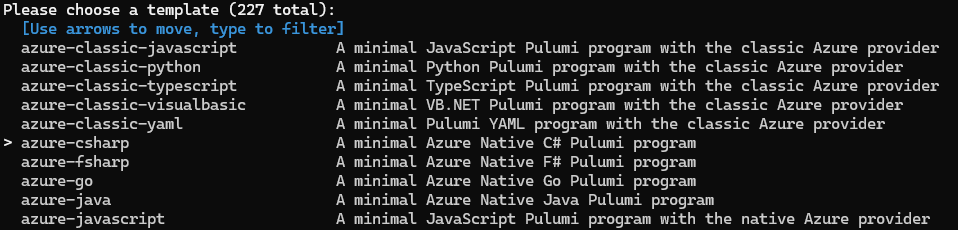
You must provide a project name, description, and stack. The stack is how Pulumi separates your environments, something like dev, uat and prod. It must be unique within the project’s namespace.
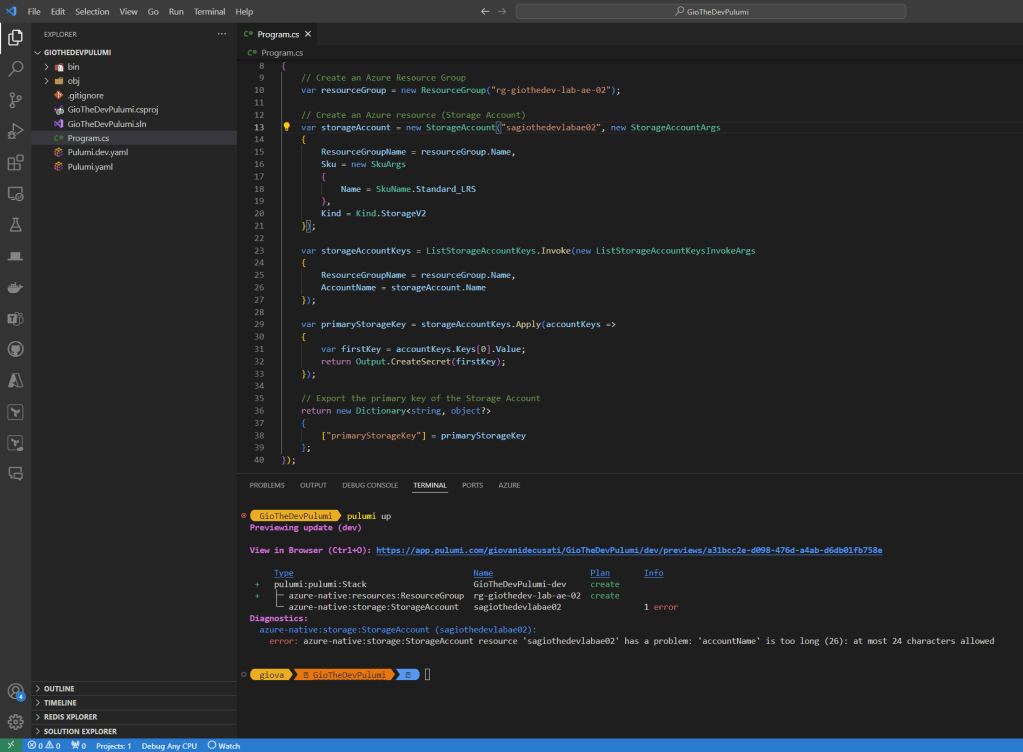
Initially, you will have an empty Program.cs where you can start adding your resources, followed by Pulumi.yaml (defines the project) and Pulumi.dev.yaml (contains configuration values for the stack you initialized).
using Pulumi;
using Pulumi.AzureNative.Resources;
using Pulumi.AzureNative.Storage;
using Pulumi.AzureNative.Storage.Inputs;
using System.Collections.Generic;

return await Pulumi.Deployment.RunAsync(() =>
{
    // Create an Azure Resource Group
    var resourceGroup = new ResourceGroup("rg-giothedev-lab-ae-02");

    // Create an Azure resource (Storage Account)
    var storageAccount = new StorageAccount("sagiothedevlabae", new StorageAccountArgs
    {
        ResourceGroupName = resourceGroup.Name,
        Sku = new SkuArgs
        {
            Name = SkuName.Standard_LRS
        },
        Kind = Kind.StorageV2
    });

    var storageAccountKeys = ListStorageAccountKeys.Invoke(new ListStorageAccountKeysInvokeArgs
    {
        ResourceGroupName = resourceGroup.Name,
        AccountName = storageAccount.Name
    });

    var primaryStorageKey = storageAccountKeys.Apply(accountKeys =>
    {
        var firstKey = accountKeys.Keys[0].Value;
        return Output.CreateSecret(firstKey);
    });

    // Export the primary key of the Storage Account
    return new Dictionary<string, object?>
    {
        ["primaryStorageKey"] = primaryStorageKey
    };
});
When you are ready, type “pulumi up”. Pulumi will try to deploy your code, and you will immediately see any feedback from there. Any error will be highlighted on the screen. In this example, the name of the storage account is longer than 26 characters.
Another advantage of using Pulumi is writing unit testing. You can create unit testing with your favourite framework (xUnit, for example) and run it through your Continuous Integration (CI) pipeline.
After you have fixed all issues, try to run “pulumi up” again. This time Pulumi will apply your changes.
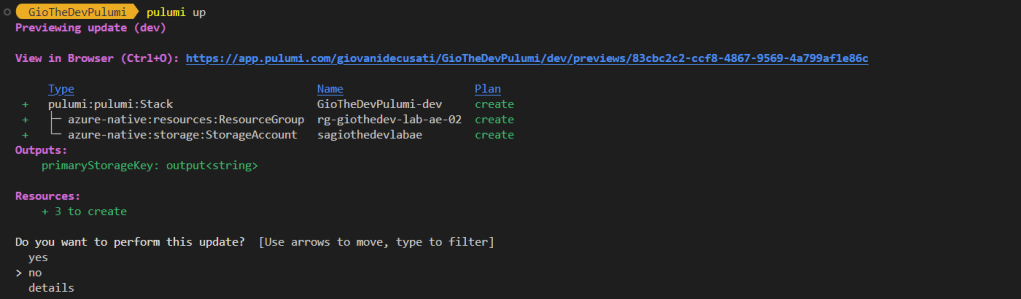
You can review the resources prior to creation by selecting “details”.
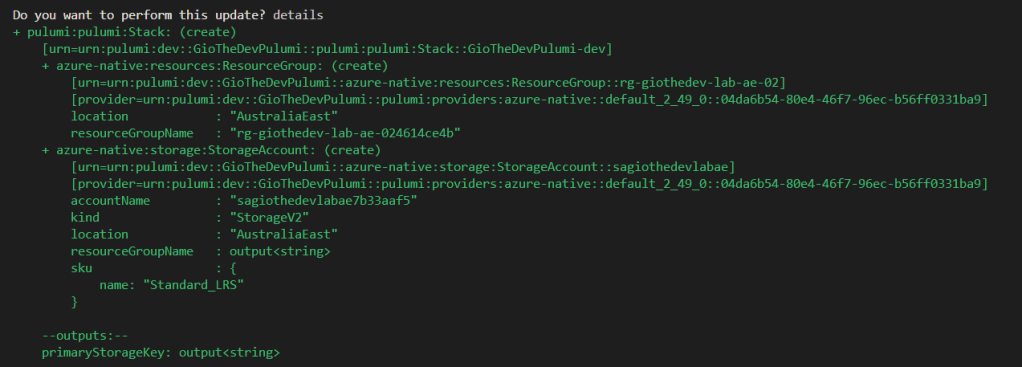
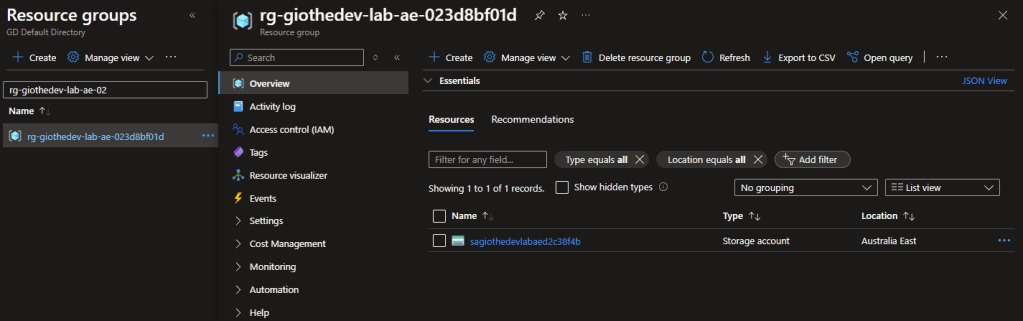
Confirm you want to proceed with the update and voila! Pulumi has created the resource group and storage account.
Pulumi inline program
In addition to use Pulumi CLI, there is an option to create Pulumi inline programs, which are methods you create in the same dotnet assembly or import from another assembly with all the context and deployment automation defined in a single CS file. In other words, you have access to all C# and .NET features as same as a regular program does. It still requires Pulumi CLI in the background, but it doesn’t require you to create a dotnet Pulumi project and Pulumi.yaml, because it uses Automation API.
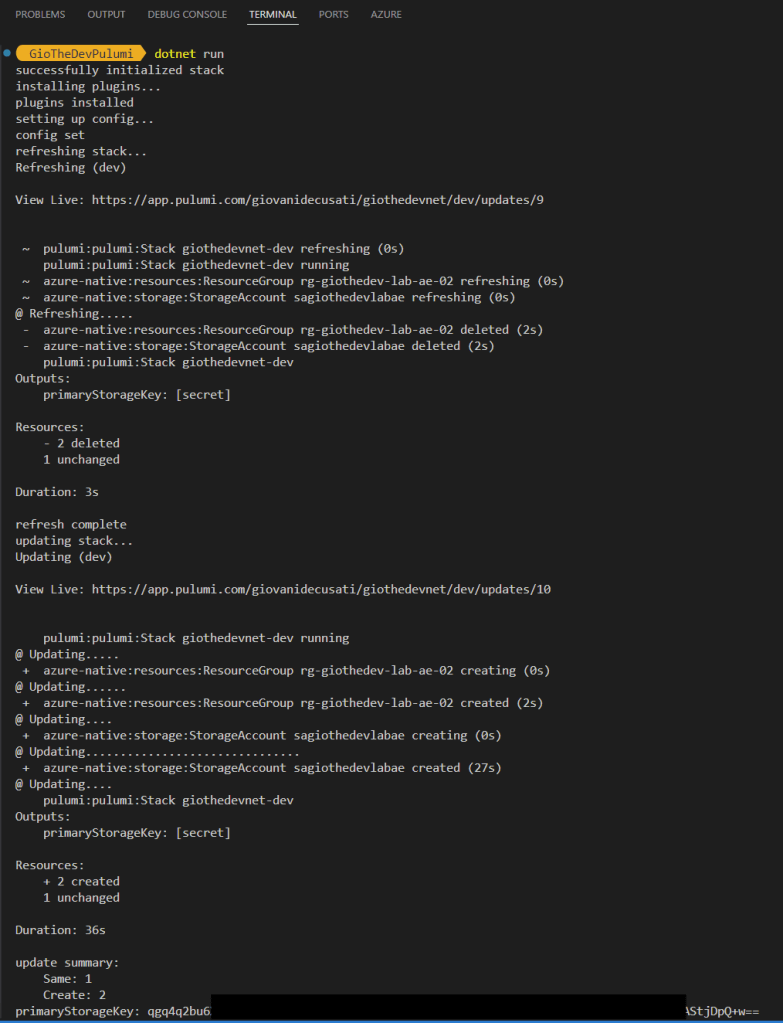
I’ve adapted the previous code to incorporate “Pulumi.Automation” package. In this program, you can run it using dotnet CLI to deploy your changes “dotnet run” or destroy your environment typing “dotnet run destroy”.
using Pulumi;
using Pulumi.Automation;
using Pulumi.AzureNative.Resources;
using Pulumi.AzureNative.Storage;
using Pulumi.AzureNative.Storage.Inputs;
using System;
using System.Collections.Generic;
using System.Linq;
using System.Threading.Tasks;

class Program
{
    static async Task Main(string[] args)
    {
        // define our pulumi program "inline"
        var program = PulumiFn.Create(() =>
        {
            // Create an Azure Resource Group
            var resourceGroup = new ResourceGroup("rg-giothedev-lab-ae-02", new ResourceGroupArgs() { Location = "australiaeast" });

            // Create an Azure resource (Storage Account)
            var storageAccount = new StorageAccount("sagiothedevlabae", new StorageAccountArgs
            {
                ResourceGroupName = resourceGroup.Name,
                Sku = new SkuArgs
                {
                    Name = SkuName.Standard_LRS
                },
                Kind = Kind.StorageV2,
                Location = "australiaeast"
            });

            var storageAccountKeys = ListStorageAccountKeys.Invoke(new ListStorageAccountKeysInvokeArgs
            {
                ResourceGroupName = resourceGroup.Name,
                AccountName = storageAccount.Name
            });

            var primaryStorageKey = storageAccountKeys.Apply(accountKeys =>
            {
                var firstKey = accountKeys.Keys[0].Value;
                return Output.CreateSecret(firstKey);
            });

            // Export the primary key of the Storage Account
            return new Dictionary<string, object?>
            {
                ["primaryStorageKey"] = primaryStorageKey
            };
        });

        // to destroy our program, we can run "dotnet run destroy"
        var destroy = args.Any() && args[0] == "destroy";

        var projectName = "giothedevnet";
        var stackName = "dev";

        // create or select a stack matching the specified name and project
        // this will set up a workspace with everything necessary to run our inline program (program)
        var stackArgs = new InlineProgramArgs(projectName, stackName, program);
        var stack = await LocalWorkspace.CreateOrSelectStackAsync(stackArgs);

        Console.WriteLine("successfully initialized stack");

        // for inline programs, we must manage plugins ourselves
        Console.WriteLine("installing plugins...");
        await stack.Workspace.InstallPluginAsync("azure-native", "v2.49.1");
        Console.WriteLine("plugins installed");

        // set stack configuration specifying the region to deploy
        Console.WriteLine("setting up config...");
        await stack.SetConfigAsync("azure:region", new ConfigValue("australiaeast"));
        Console.WriteLine("config set");

        Console.WriteLine("refreshing stack...");
        await stack.RefreshAsync(new RefreshOptions { OnStandardOutput = Console.WriteLine });
        Console.WriteLine("refresh complete");

        if (destroy)
        {
            Console.WriteLine("destroying stack...");
            await stack.DestroyAsync(new DestroyOptions { OnStandardOutput = Console.WriteLine });
            Console.WriteLine("stack destroy complete");
        }
        else
        {
            Console.WriteLine("updating stack...");
            var result = await stack.UpAsync(new UpOptions { OnStandardOutput = Console.WriteLine });

            if (result.Summary.ResourceChanges != null)
            {
                Console.WriteLine("update summary:");
                foreach (var change in result.Summary.ResourceChanges)
                    Console.WriteLine($"    {change.Key}: {change.Value}");
            }

            Console.WriteLine($"primaryStorageKey: {result.Outputs["primaryStorageKey"].Value}");
        }
    }
}
As a result, Pulumi creates your resources without needing to call the Pulumi CLI tool, which can be beneficial for a program that triggers automation during the application flow which can be useful in situations you want to call an API to spin up resources in the cloud.
Takeaways
Pulumi is a tool that allows developers to pick their favourite language to automate and build infrastructure. However, proper cloud implementation will depend on the team’s maturity. If you have experience with CDK for AWS, you realize that Pulumi has a similar purpose. Where CDK for AWS supports TypeScript, JavaScript, Python, Java, C#/.Net, and Go, Pulumi has multi-cloud advantage.
There are other ways to represent infrastructure-as-code, such as a Domain-Specific Language (DSL) that uses declarative syntax to specify resources. Examples of DSLs are:
- HCL (HashiCorp Configuration Language) used by Terraform.
- Bicep and ARM Templates (JSON) used by Azure.
- AWS Cloud Formation (represented by JSON or YAML formats).
DSLs presents some challenges in a large and complex environment. If you want to increase reusability, you may add complexity, but the other way around increases code duplication. You have to pick which side of the scale you will sacrifice.
Some pros and cons of adopting Pulumi:
Pros:
- Imperative languages are way more flexible than DSL. It comes with the benefits of IDE, such as IntelliSense and refactoring.
- It increases reusability in your code because you can implement your libraries and distribute or share them through packages.
- You can implement unit testing.
- There is a Pulumi Azure DevOps task extension that you can use to create your CI/CD pipelines.
- There are tools to convert Bicep and Terraform into Pulumi.
- You can combine Pulumi inline programs within your application’s flow.
- Offers support for multi-cloud.
- You have to pay for Pulumi Cloud for configuration management.
Cons:
- Although Pulumi uses Azure Resource Manager (ARM) APIs to create, update, or delete resources, I couldn’t see the deployment history on the Azure Portal during my testing.
- Pulumi Cloud requires a paid subscription for Teams and Enterprises; however, you can store the state in a storage account.
- Bicep and Terraform are industry standards.
- Finding Platform Engineers who can work with imperative languages might be challenging.
Things to consider when adopting infrastructure-as-code using imperative languages:
- Small teams, organizations and workload size.
- High maturity of the software development team.
- Team members with cloud experience.
- You must know security, regulation, compliance, and other standards because different teams can manage them.
- Not everyone will want to use imperative language to specify resources, policies, monitoring, landing zones, or blueprints.
When this journey began, I was seeking a tool that could create Azure resources using the C# language through application calls. Pulumi has proven to be a powerful tool that can be combined with your favourite DSL to streamline resource automation and provisioning. Whether you have a software-as-service or a deployment portal, Pulumi might be a good fit. You can use Pulumi to automate parts of your infrastructure, such as SQL databases, storage accounts, etc., based on API requests. This enables you to employ Pulumi in a small part of your ecosystem, reserving the use of DSL for everything else.
I hope you found this article helpful and gained insight into Pulumi and DSLs.
References:
- Pulumi – Infrastructure as Code in Any Programming Language
- Azure Resource Manager SDK for .NET – Azure for .NET Developers | Microsoft Learn
- What is the AWS CDK? – AWS Cloud Development Kit (AWS CDK) v2 (amazon.com)
- What is AWS CloudFormation? – AWS CloudFormation (amazon.com)
- What is Terraform | Terraform | HashiCorp Developer


Leave a comment